When voiding an AR deposit, a reversing entry will be created on the date the void occurred. Depending on the time you are working through the simulation, the reversing entry can fall outside the simulation period.
Note: If the void occurred within the same month as the original customer payment, an adjusting entry will not be required.
To get your books back in order, follow the steps below to create and post your reversing entries.
Step 1
- Navigate to Income > Deposits. Locate the voided AR Deposit and note the deposit date.

Step 2
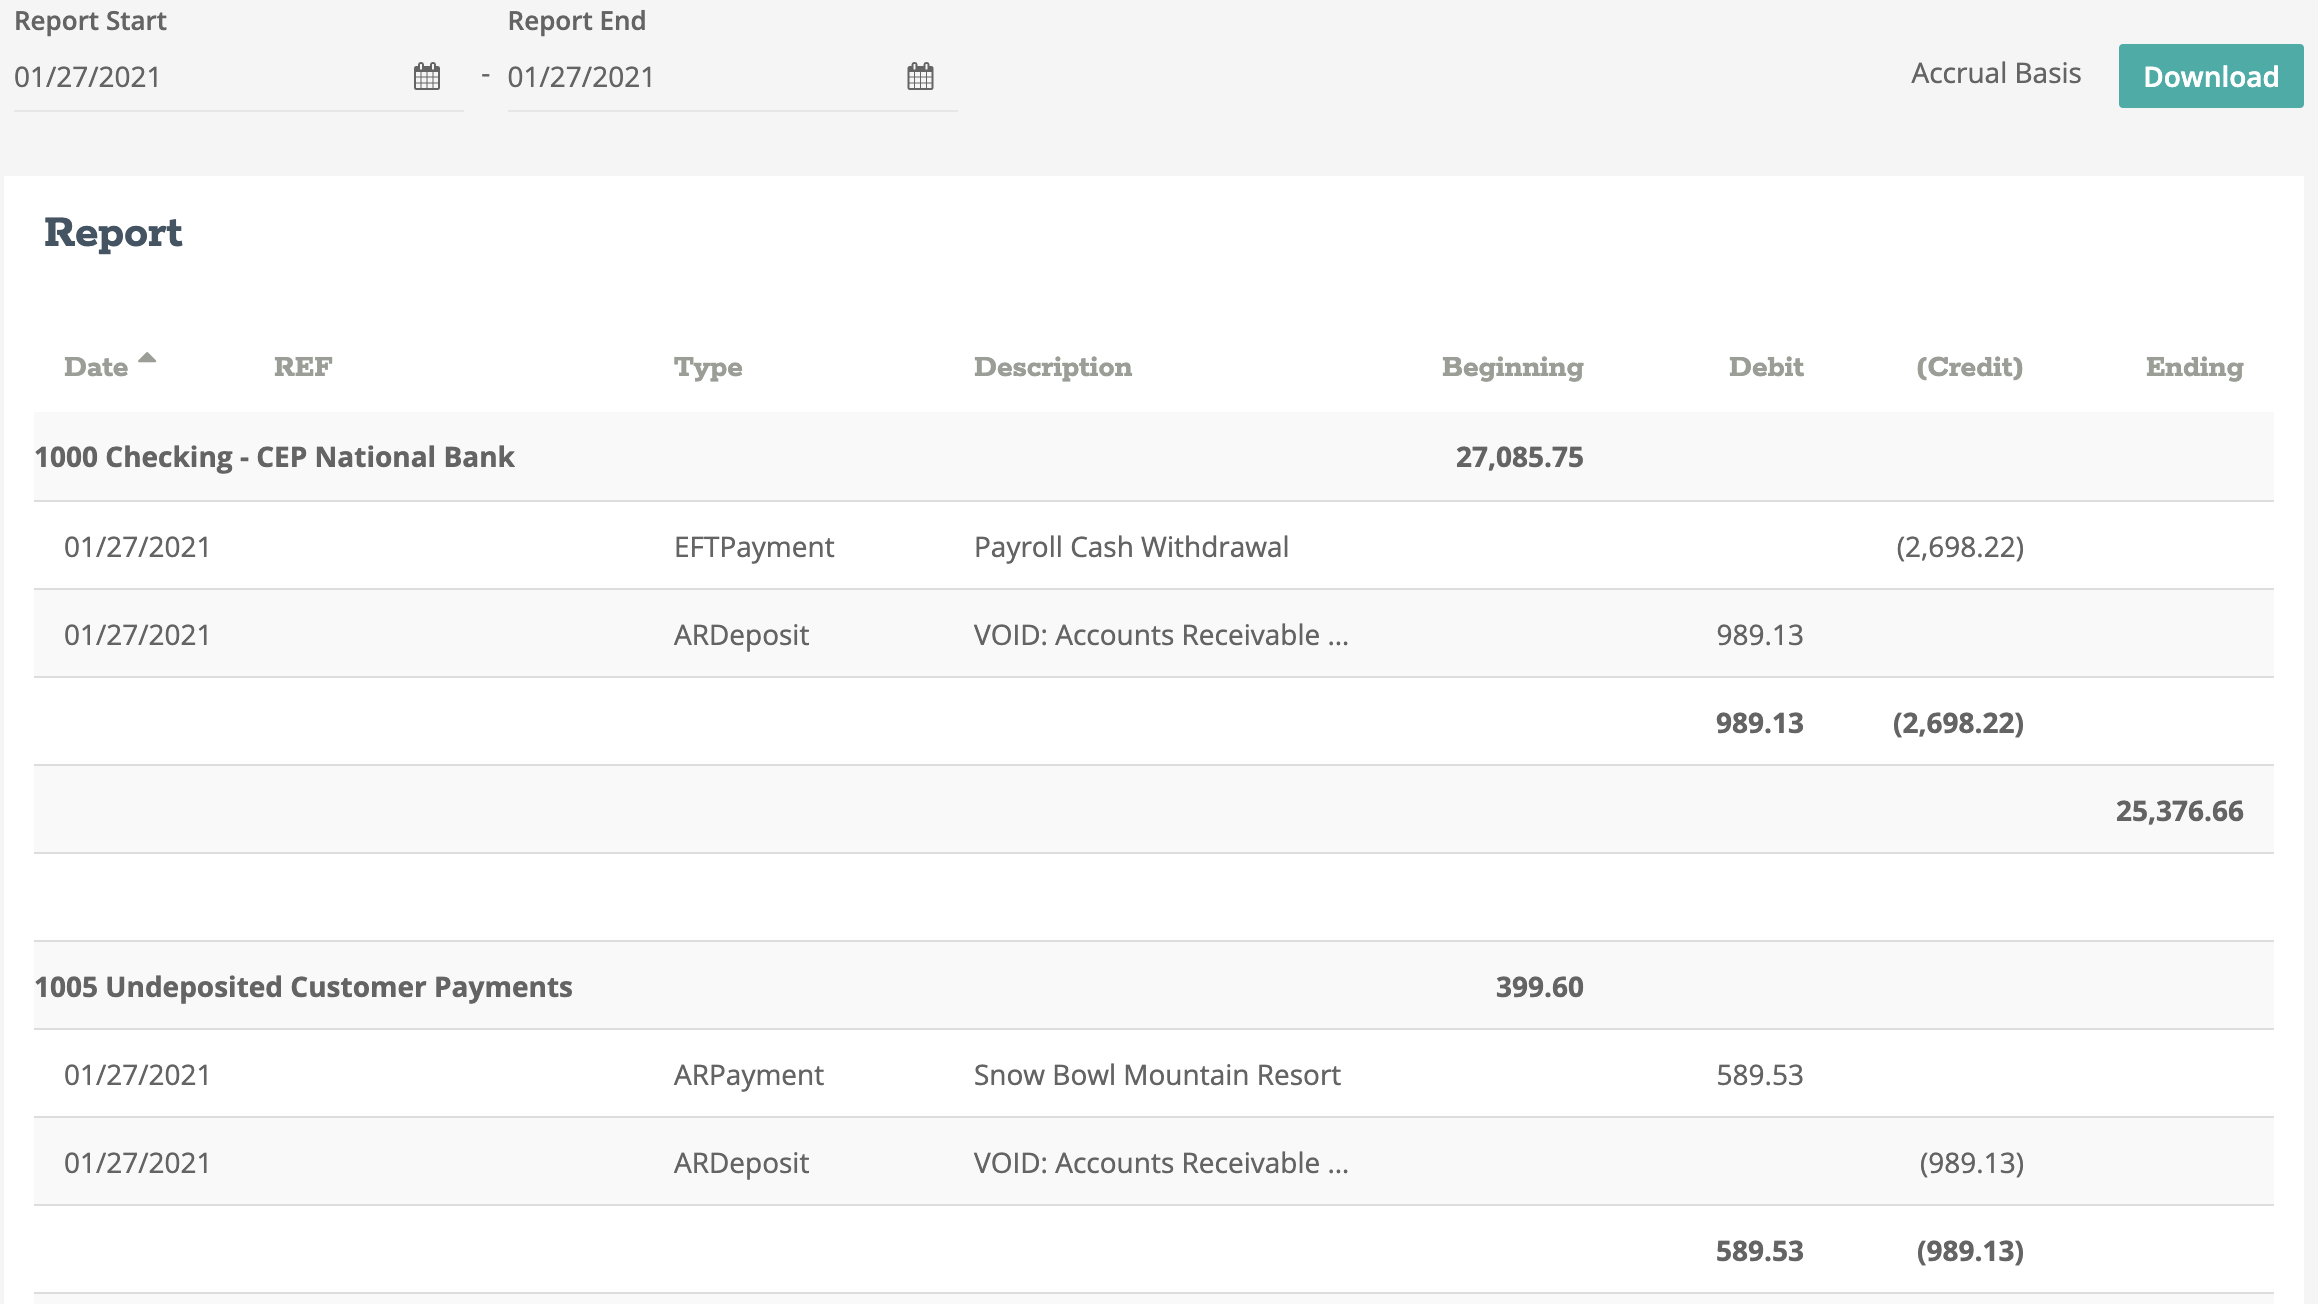
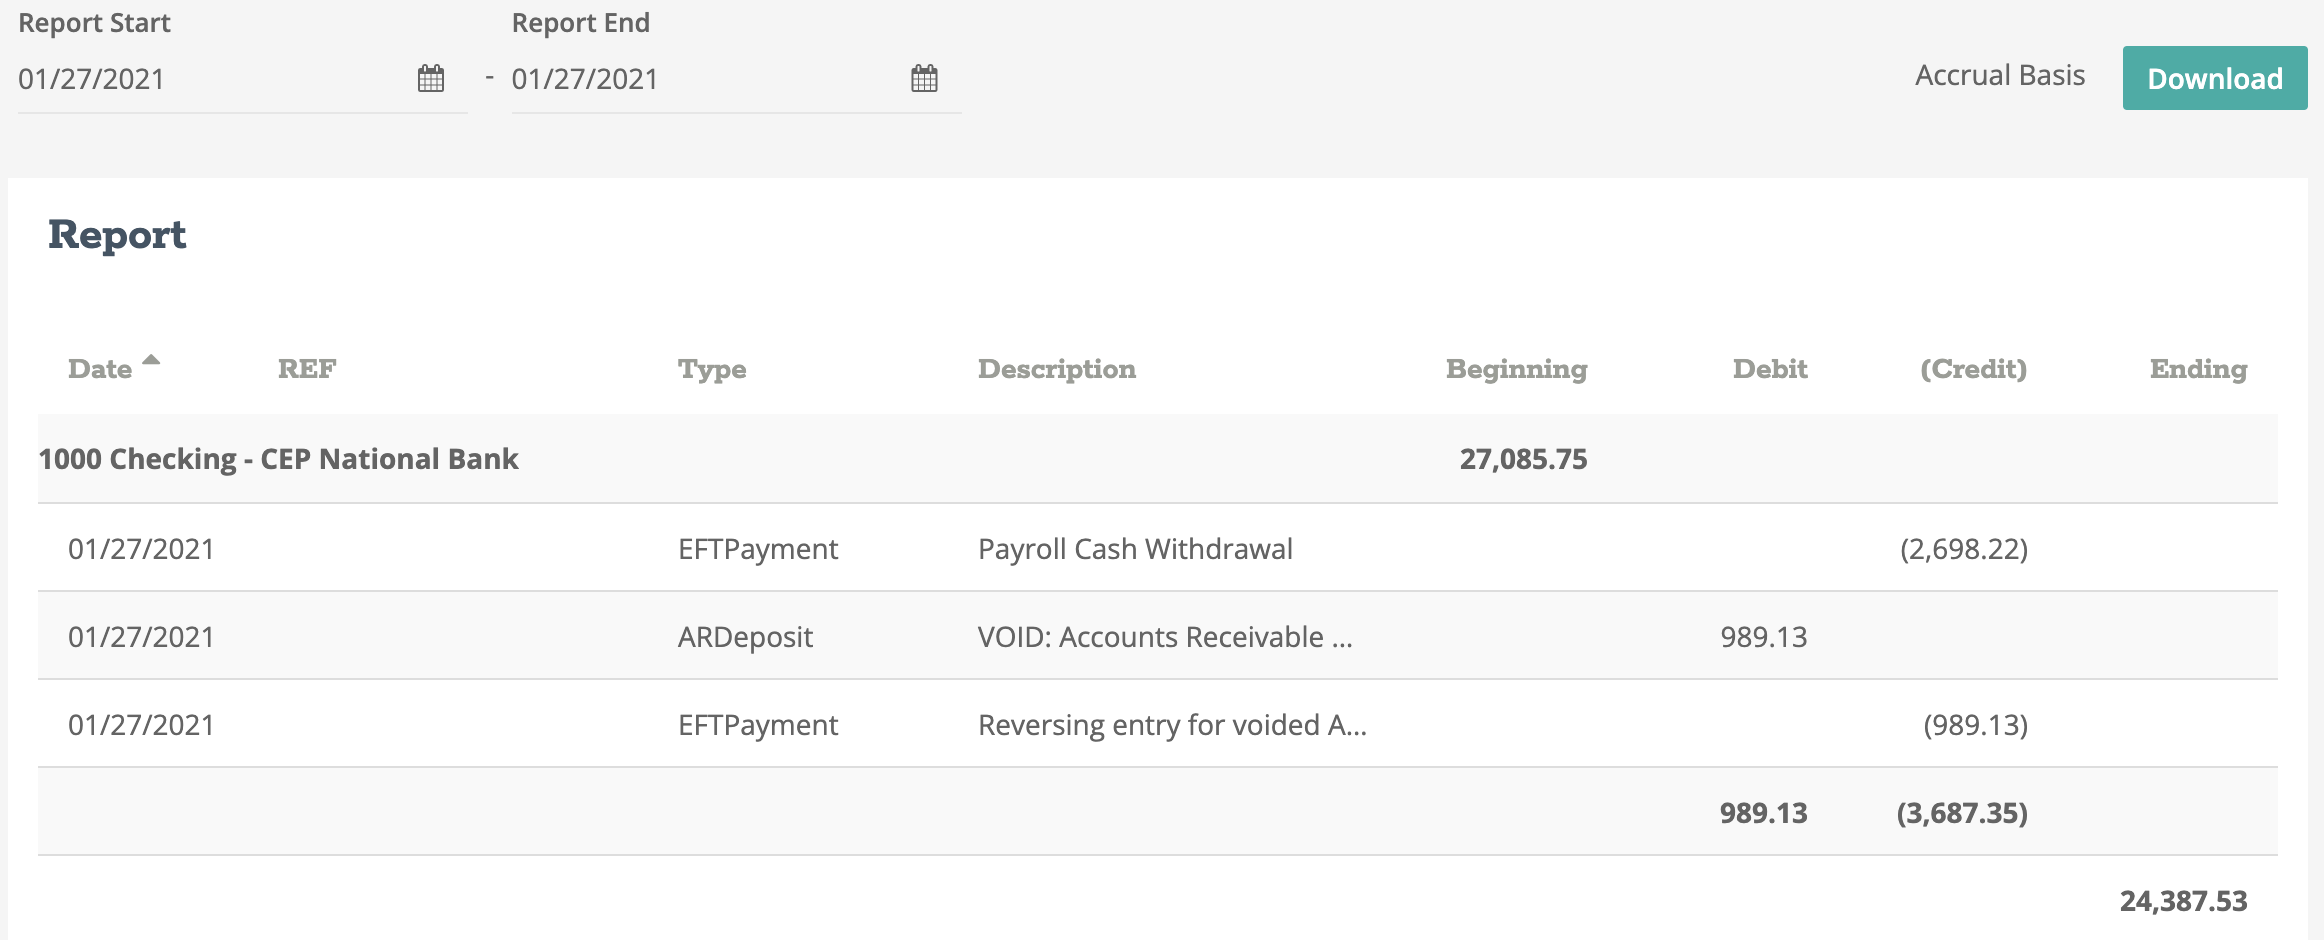
- Navigate to Reports > Accountant > General Ledger. Adjust your Report Start date and Report End date to the date of the voided AR Deposit.
Step 3
- Locate the voided transaction on the Checking account and the Undeposited Customer Payments account. Locate the amounts for each account and note the debit or credit values. See example below.
| 01/27/2021 | |
| Debit | Credit |
| Account 1000 - $989.13 | Account 1005 - $989.13 |
Note: Now because this transaction includes both a checkbook and an AR account, an exchange account will need to get setup before posting the journal entries. This is because checkbook transactions can not get posted to accounts that are assigned to the AR or AP modules and journal entries can not get posted to a checkbook.
This exchange account will not carry a balance and is used to simply clear amounts from two different accounts.
Step 4
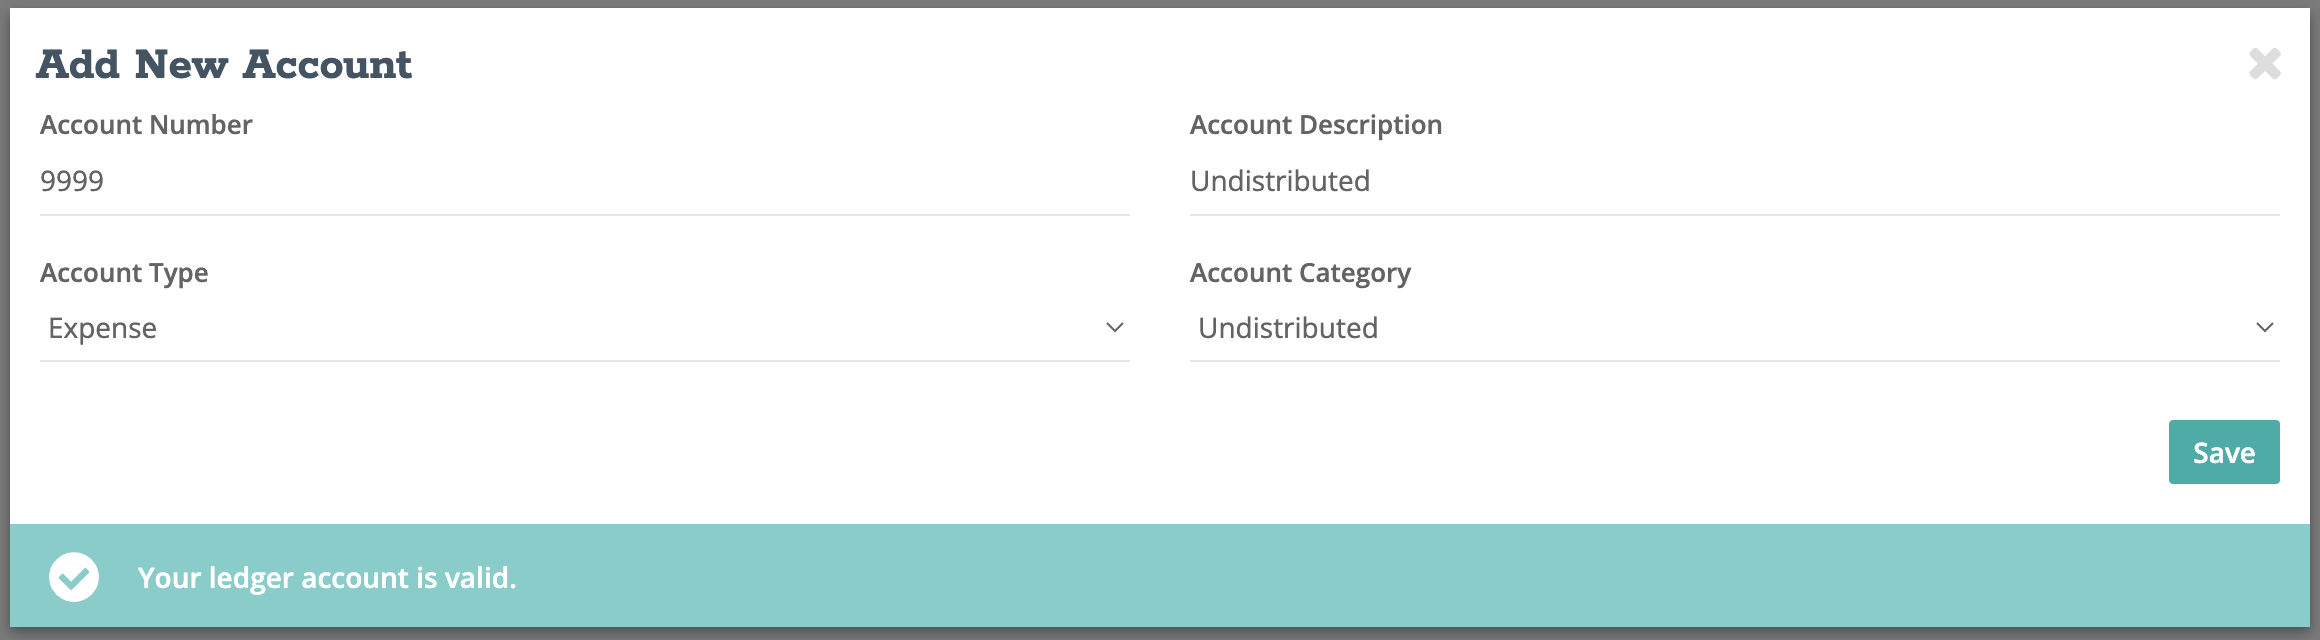
- Navigate to Settings > Business Settings > Chart of Accounts. Create account 9999 with the account description of Undistributed. Set the account type to Expense and the account category to Undistributed. Click "Save".
Step 5
- Navigate to Banking > Checkbook and we will begin by reversing the first side of the voided entry. Seeing we have to reverse a debit balance, we will post an EFT Payment (credit to the checkbook). Set the date to the voided AR Deposit date and set the description to "Reversing entry for voided AR deposit".
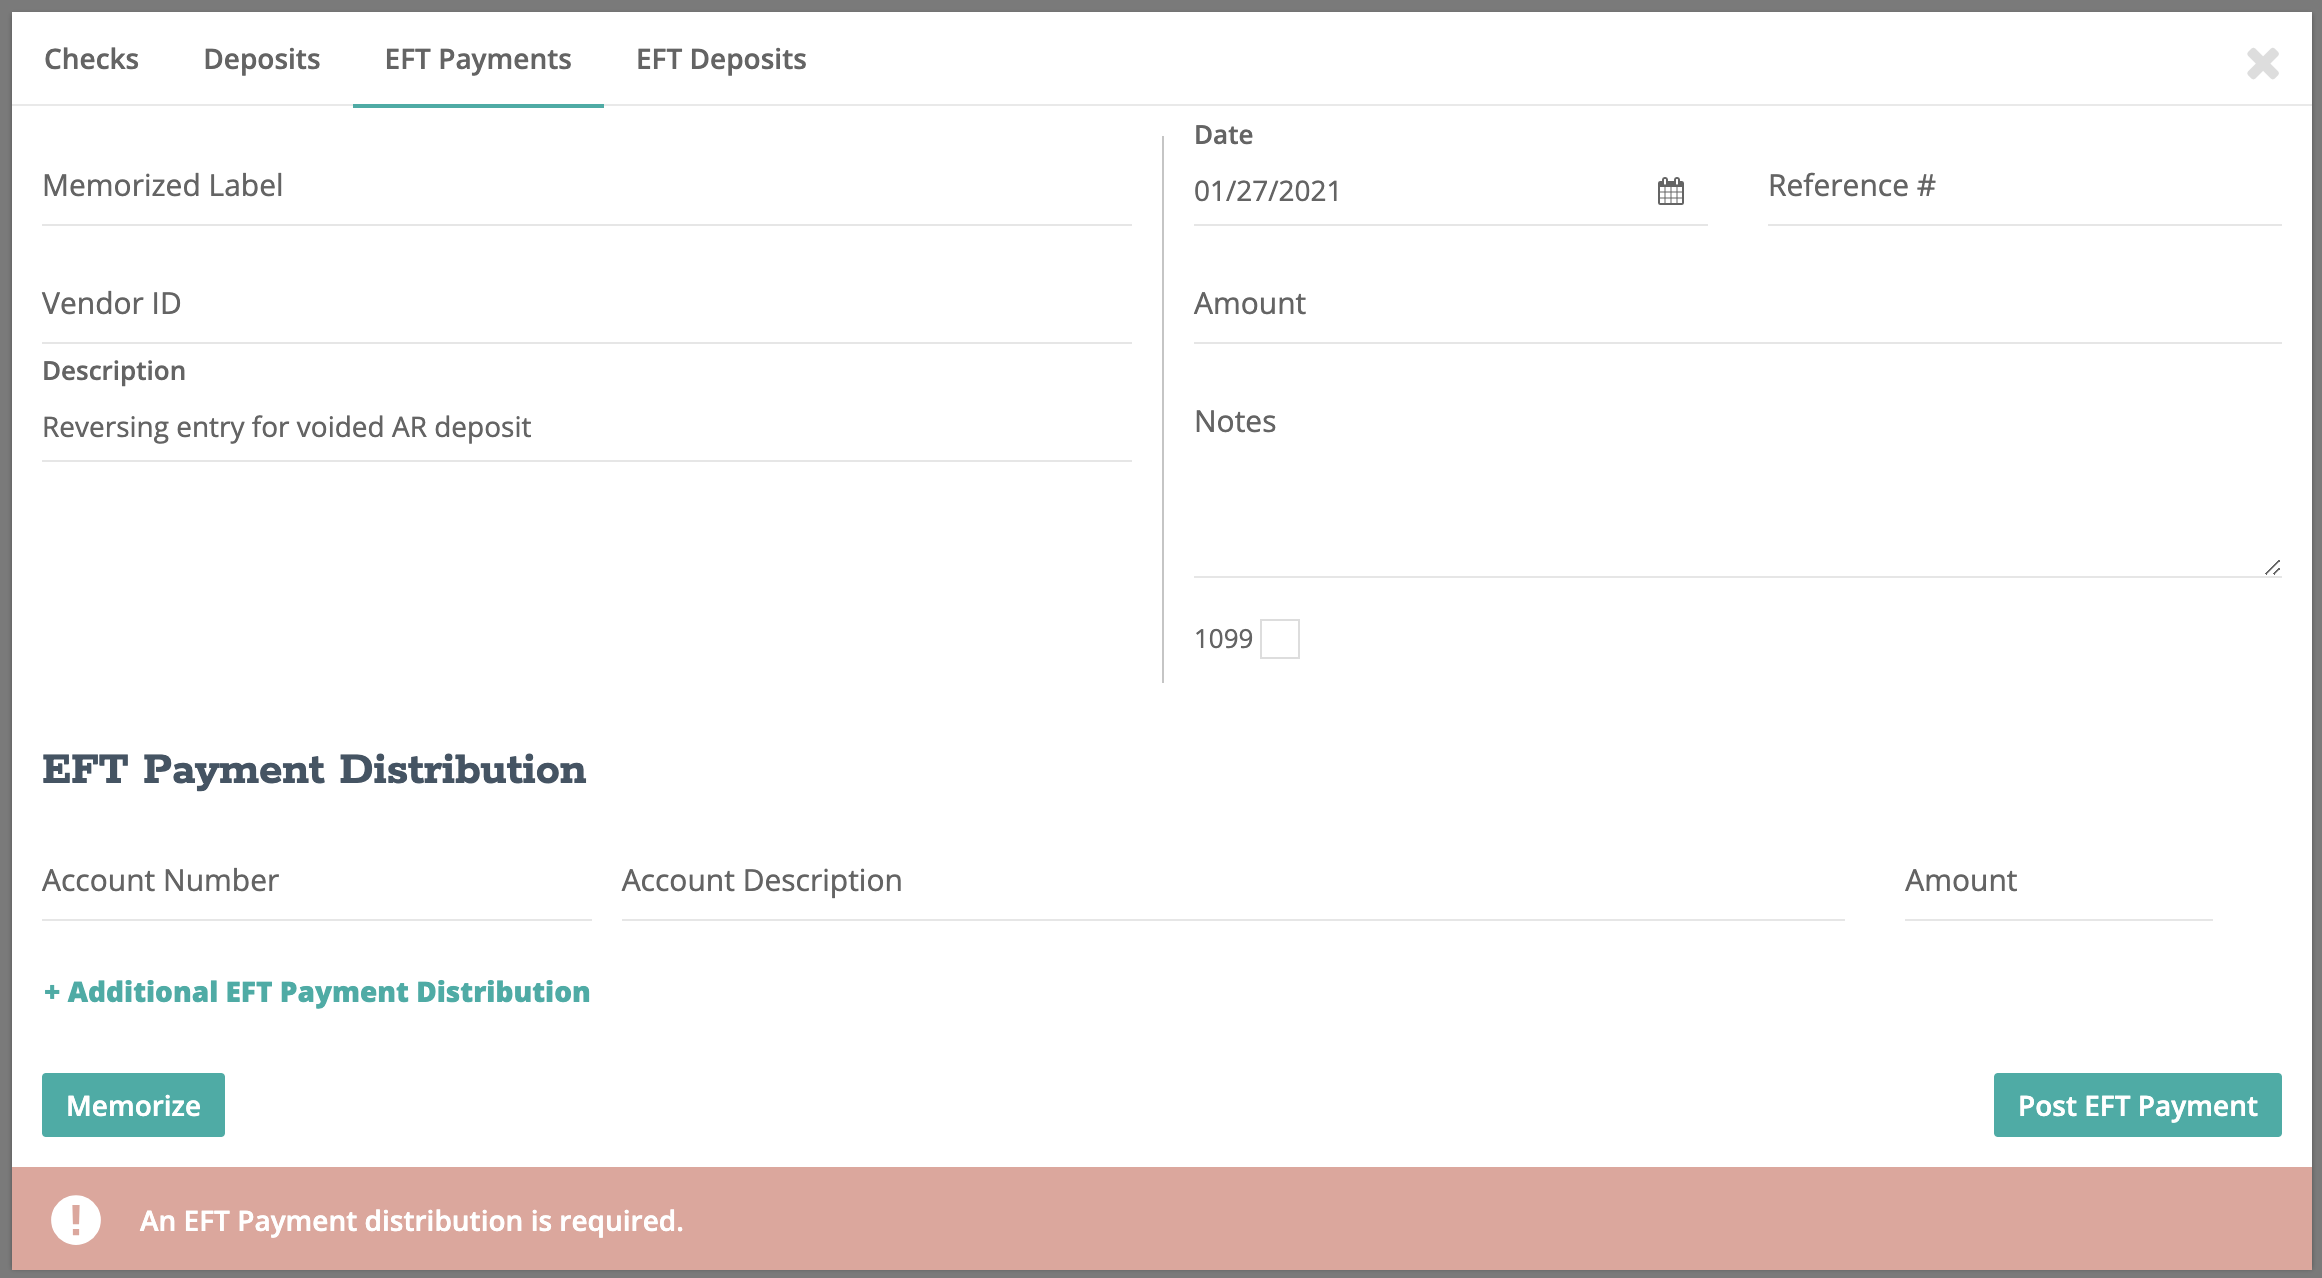
Step 6
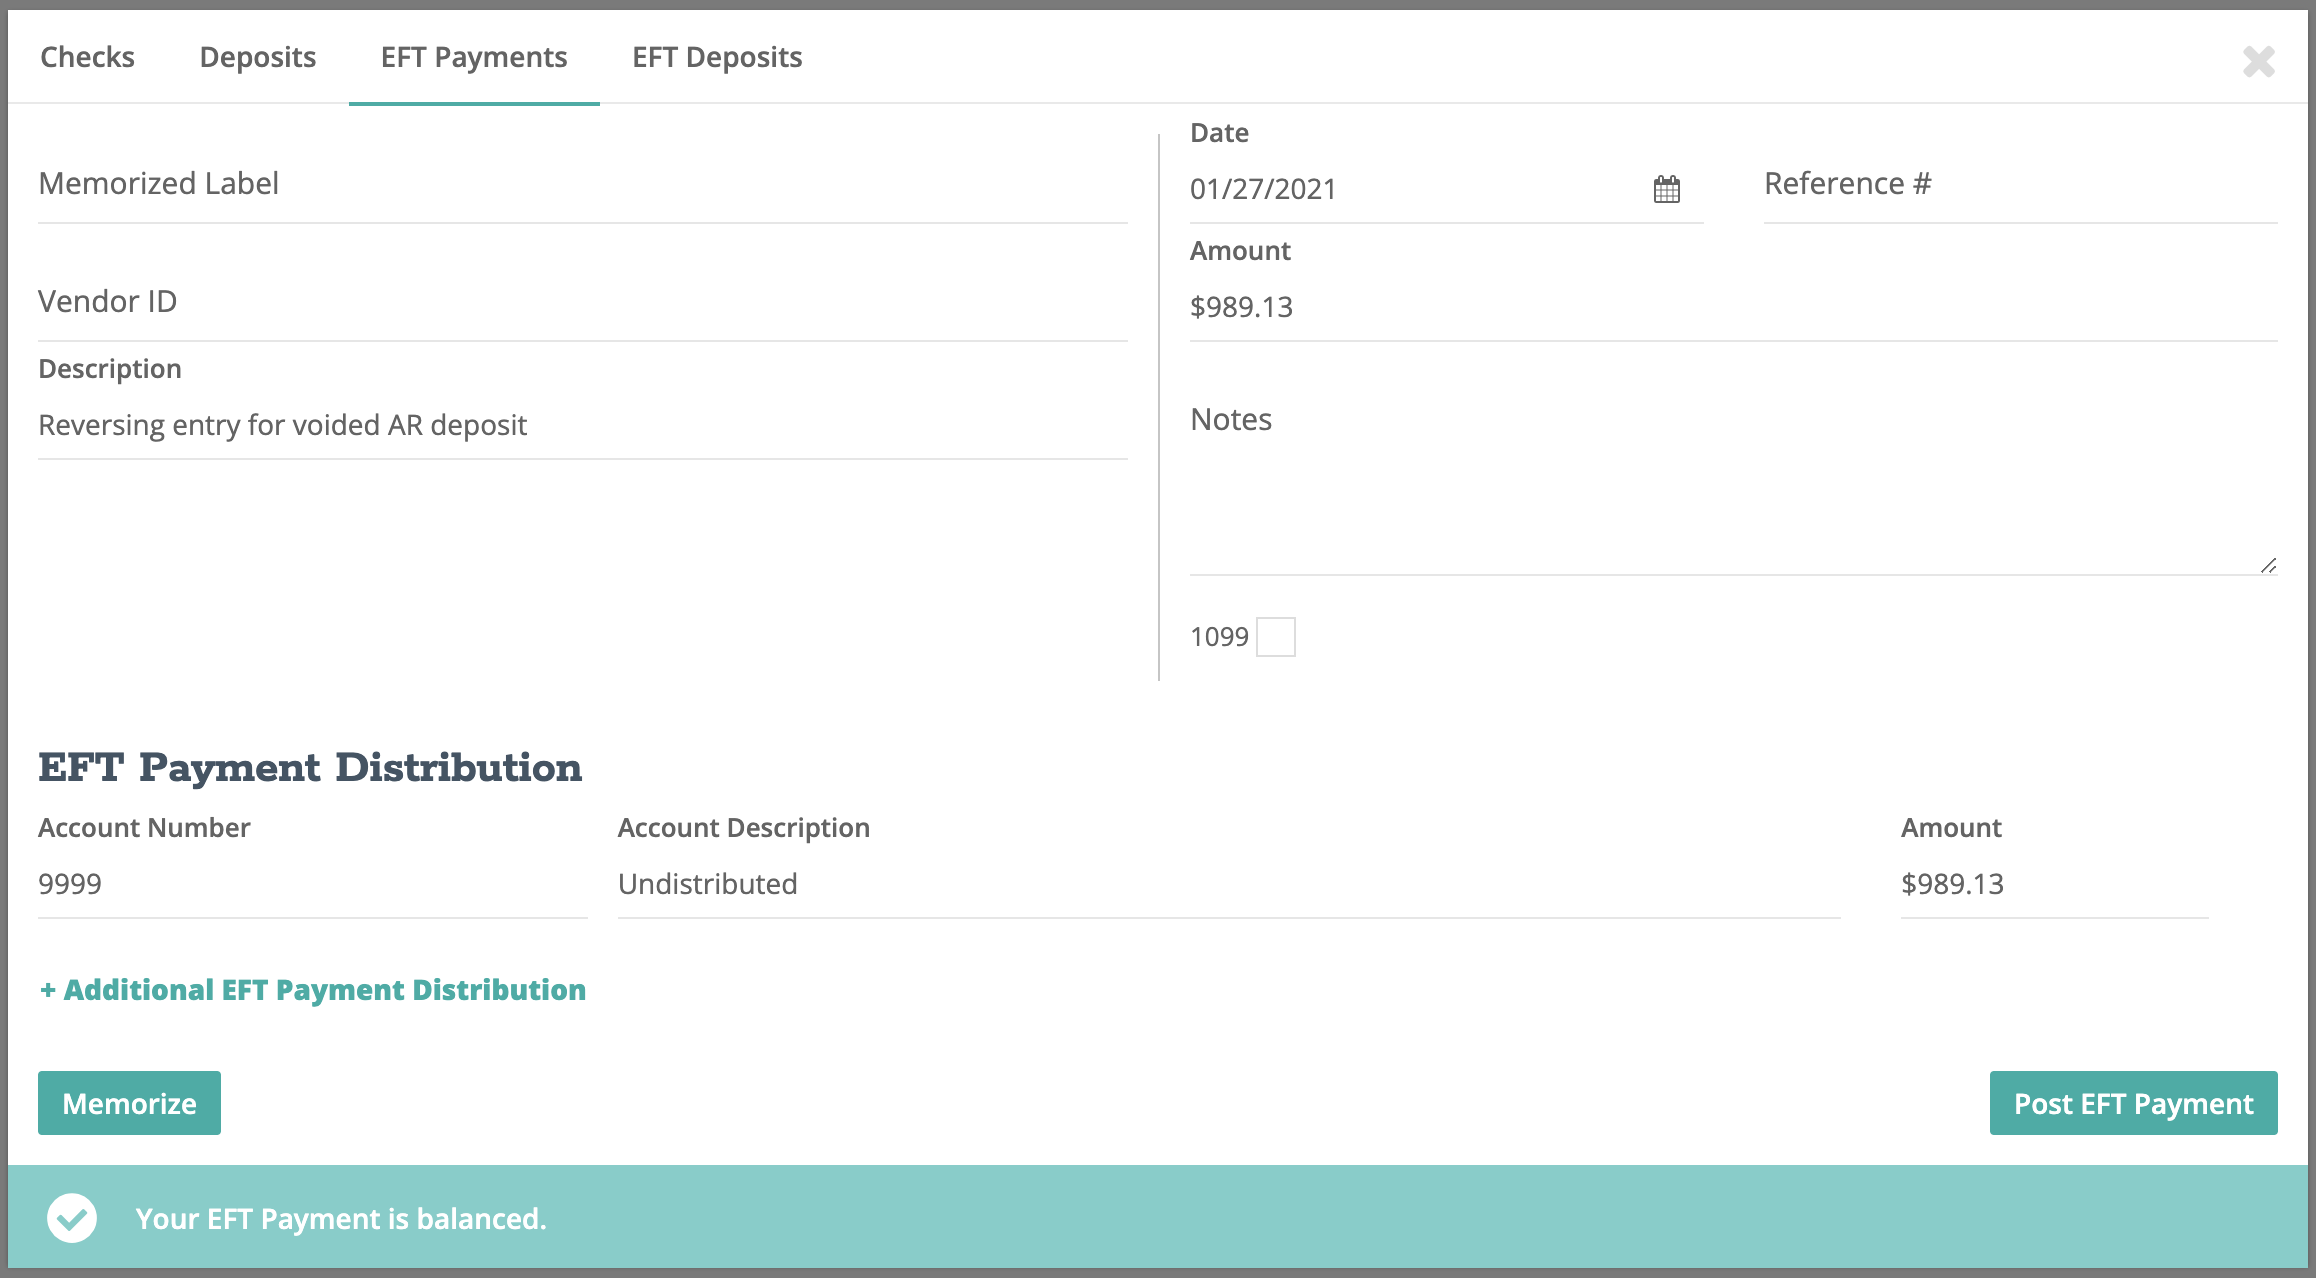
- Input the noted amount from step 3 and set the payment distribution to the exchange account - 9999. Click "Post EFT Payment".
Note: Now if we were to review the General Ledger at this point, we will notice that the void on the checkbook is reversed but our undeposited customer payments account is still off and our exchange account now has a balance.


This brings us to the second entry for this reversing entry.
Step 7
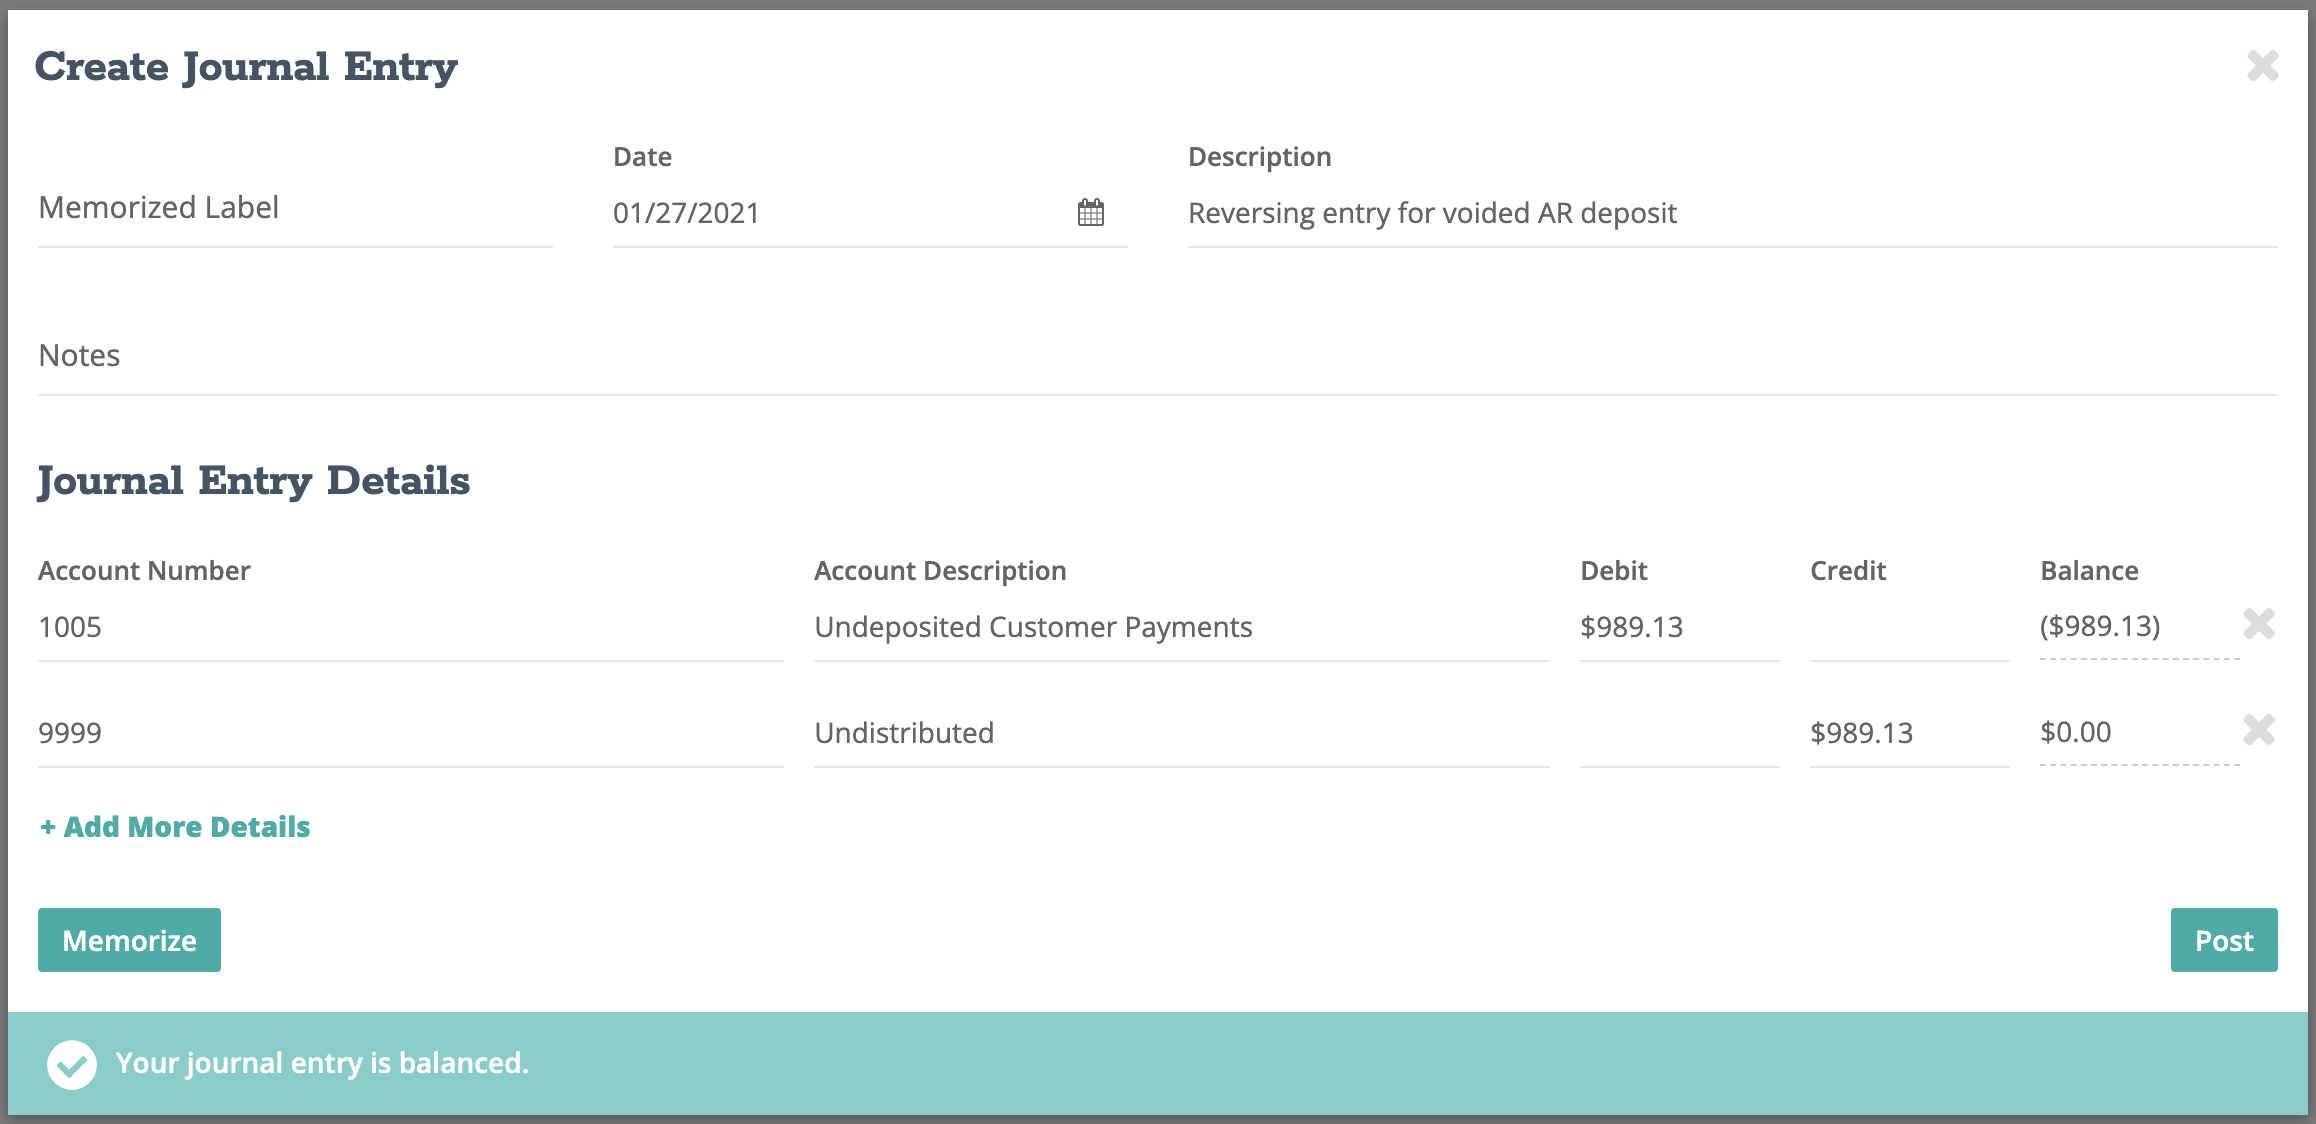
- Navigate to Journal Entries and set the date to the void date and set the description to "Reversing entry for voided AR deposit".

Step 8
- Add the Undeposited Customer Payments account to the journal entry details and reverse (debit) your noted amount. Add the Undistributed account to the journal entry details and reverse (credit) your noted amount. Click "Post".
Step 9
- Repeat this process for all additional voids that have occurred either before or during the simulation time period.
Note: This process might be required for the automatic reversing entry on the date the void occurred. If the date the void occurred falls within the simulation reporting period, repeat this process for the second entry. Note that the second entry will be opposite of the first as we are now reversing the automatic reversing entry.
After all reversing journal entries have been posted, return to your General Ledger report and review your Checkbook, Undeposited Customer Payments and Undistributed accounts. You should notice that your journal entries have balanced out those accounts by creating the reversing entries on the correct dates.
If you have made a mistake at any point posting your journal entries, learn how to edit or delete a journal entry.