When voiding an invoice, a reversing entry will be created on the date the void occurred. Depending on the time you are working through the simulation, that reversing entry can fall outside the simulation period.
Note: If the void occurred within the same month as the original invoice, a reversing entry will not be required.
To get your books back in order, follow the steps below to create and post your reversing entries.
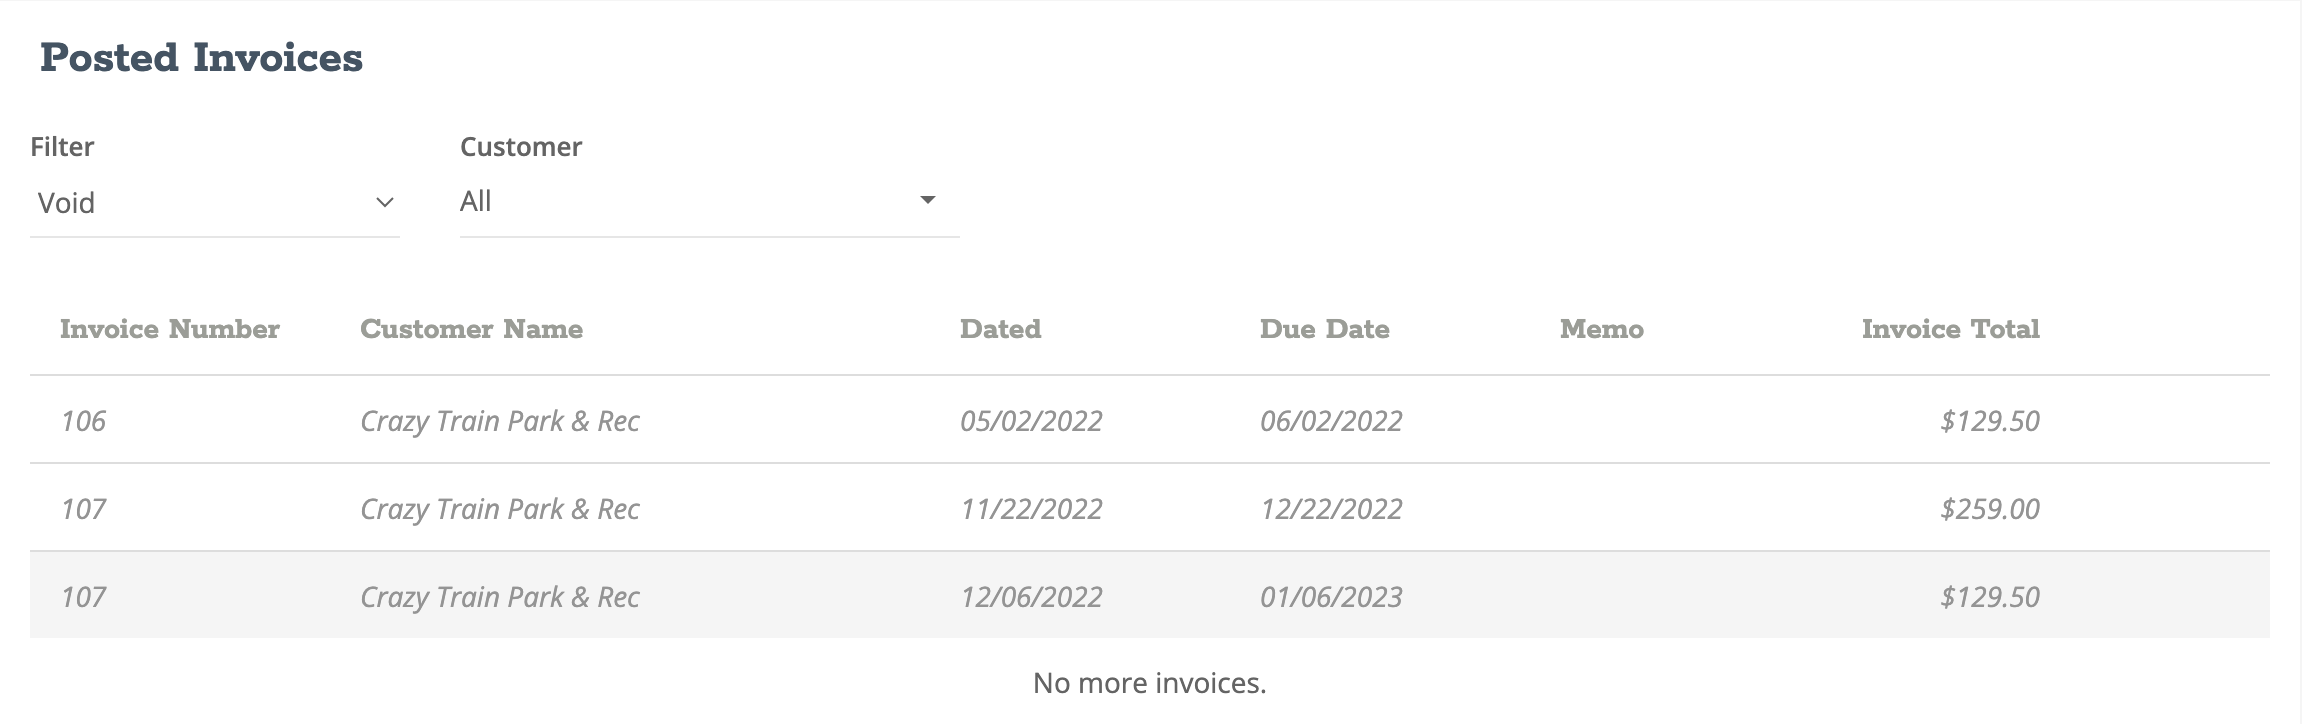
- Step 1 - Navigate to Income > Invoices, scroll down to view your posted invoices, and adjust the filter to Void. Locate the voided invoice(s) and note the invoice date(s).
- Step 2 - Navigate to Reports > Accountant > General Ledger. Adjust your Report Start Date and Report End Date so the voided invoice(s) fall within that timeframe.
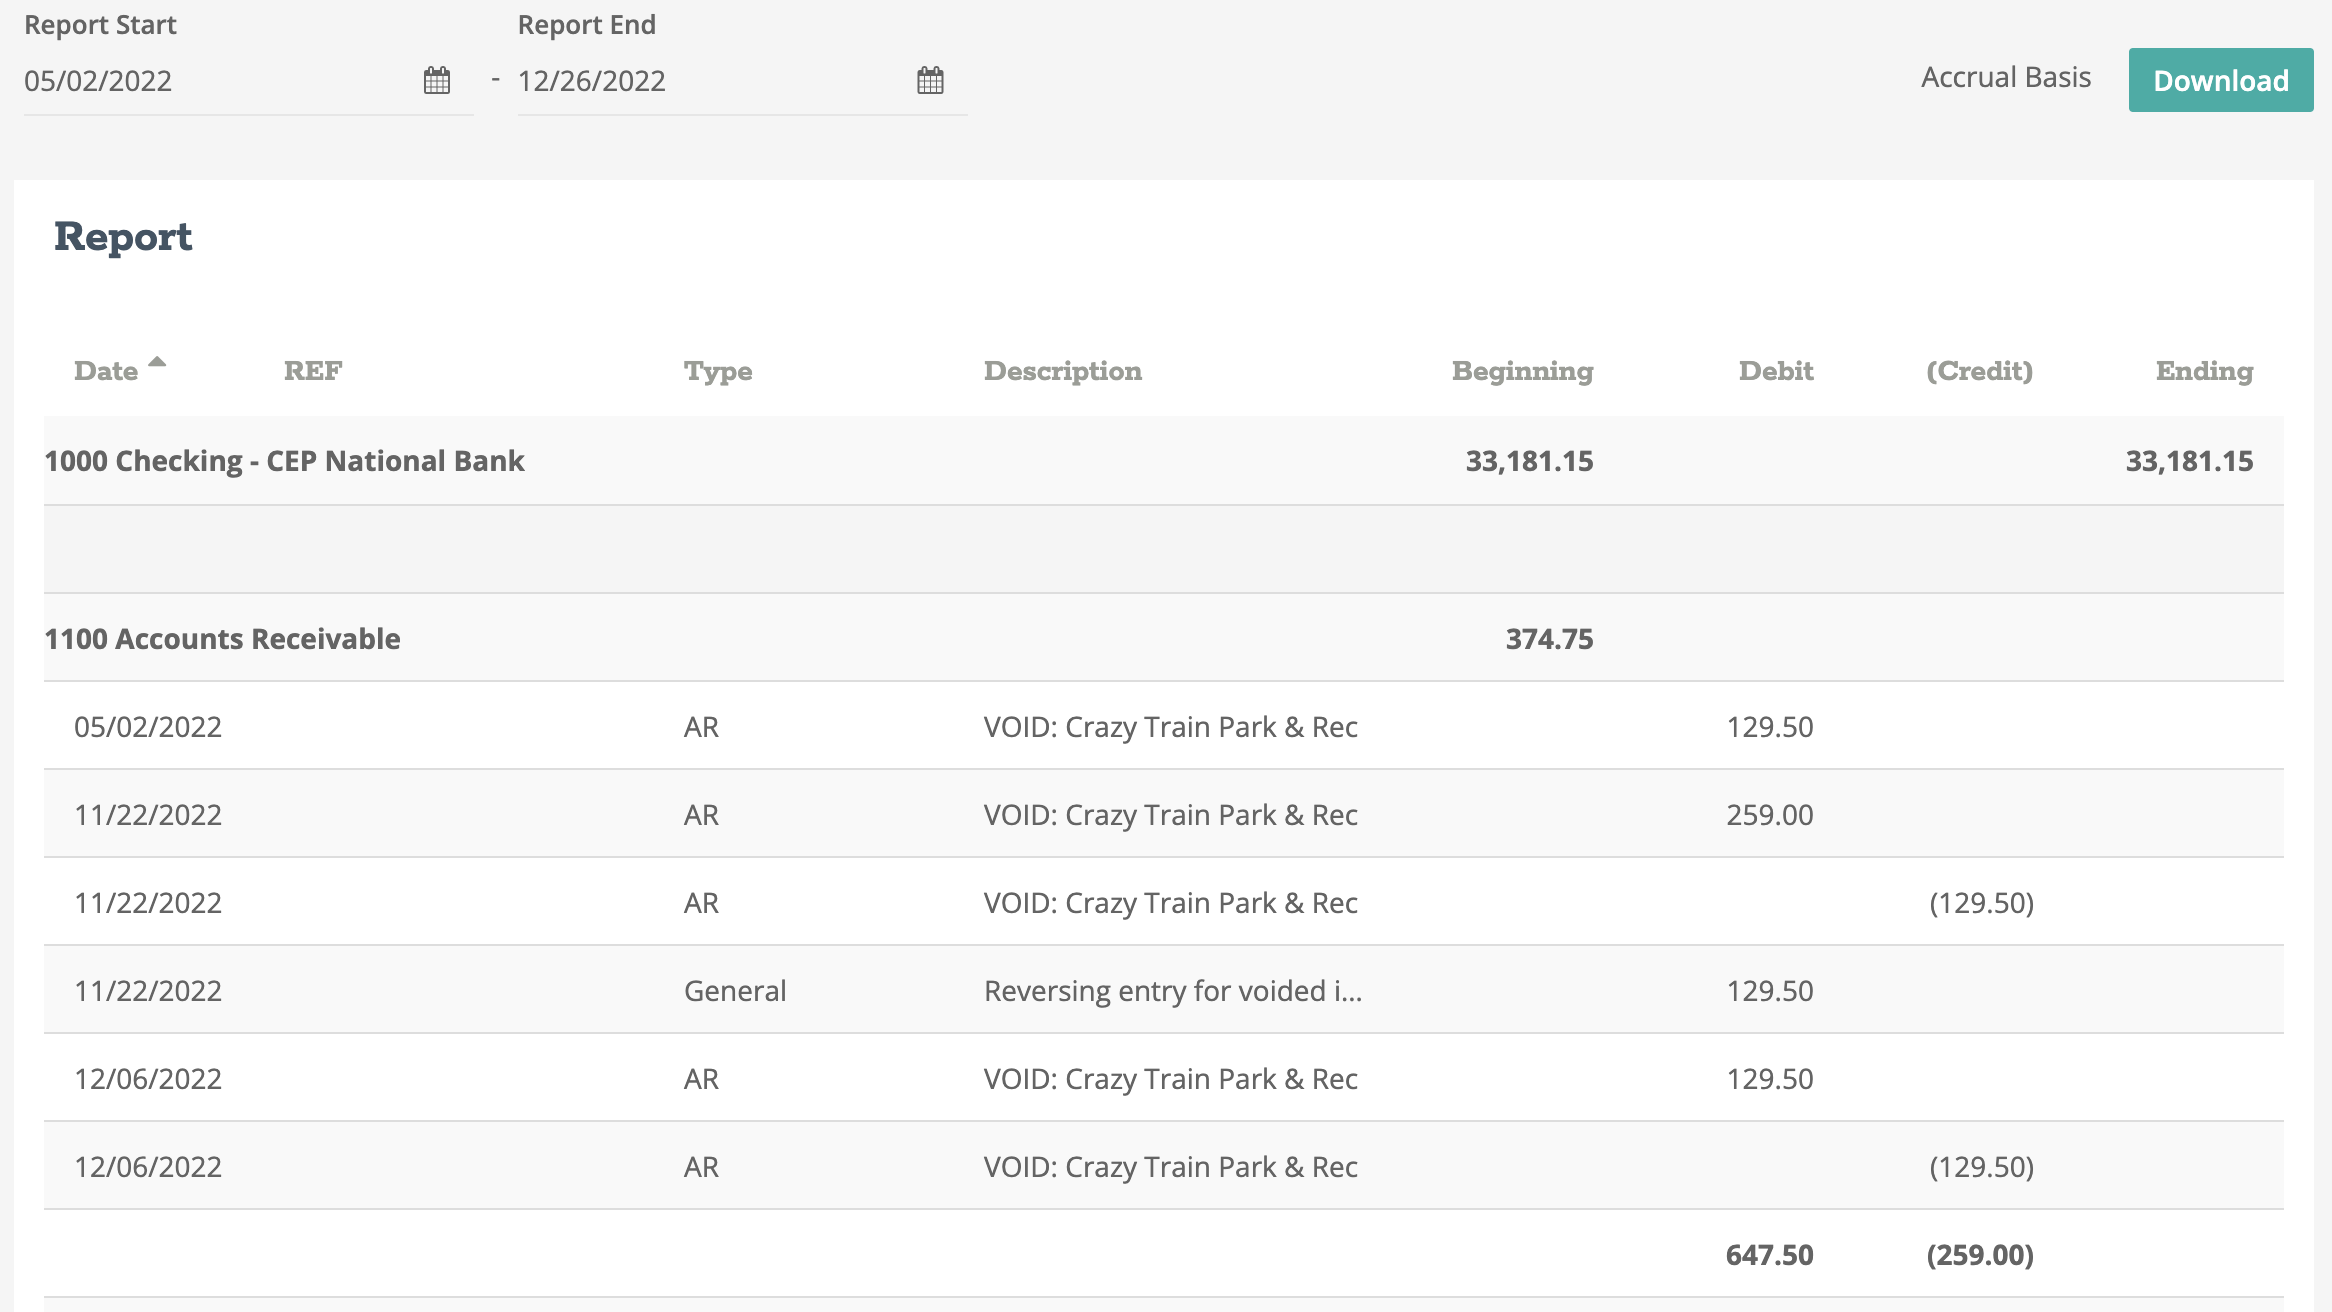
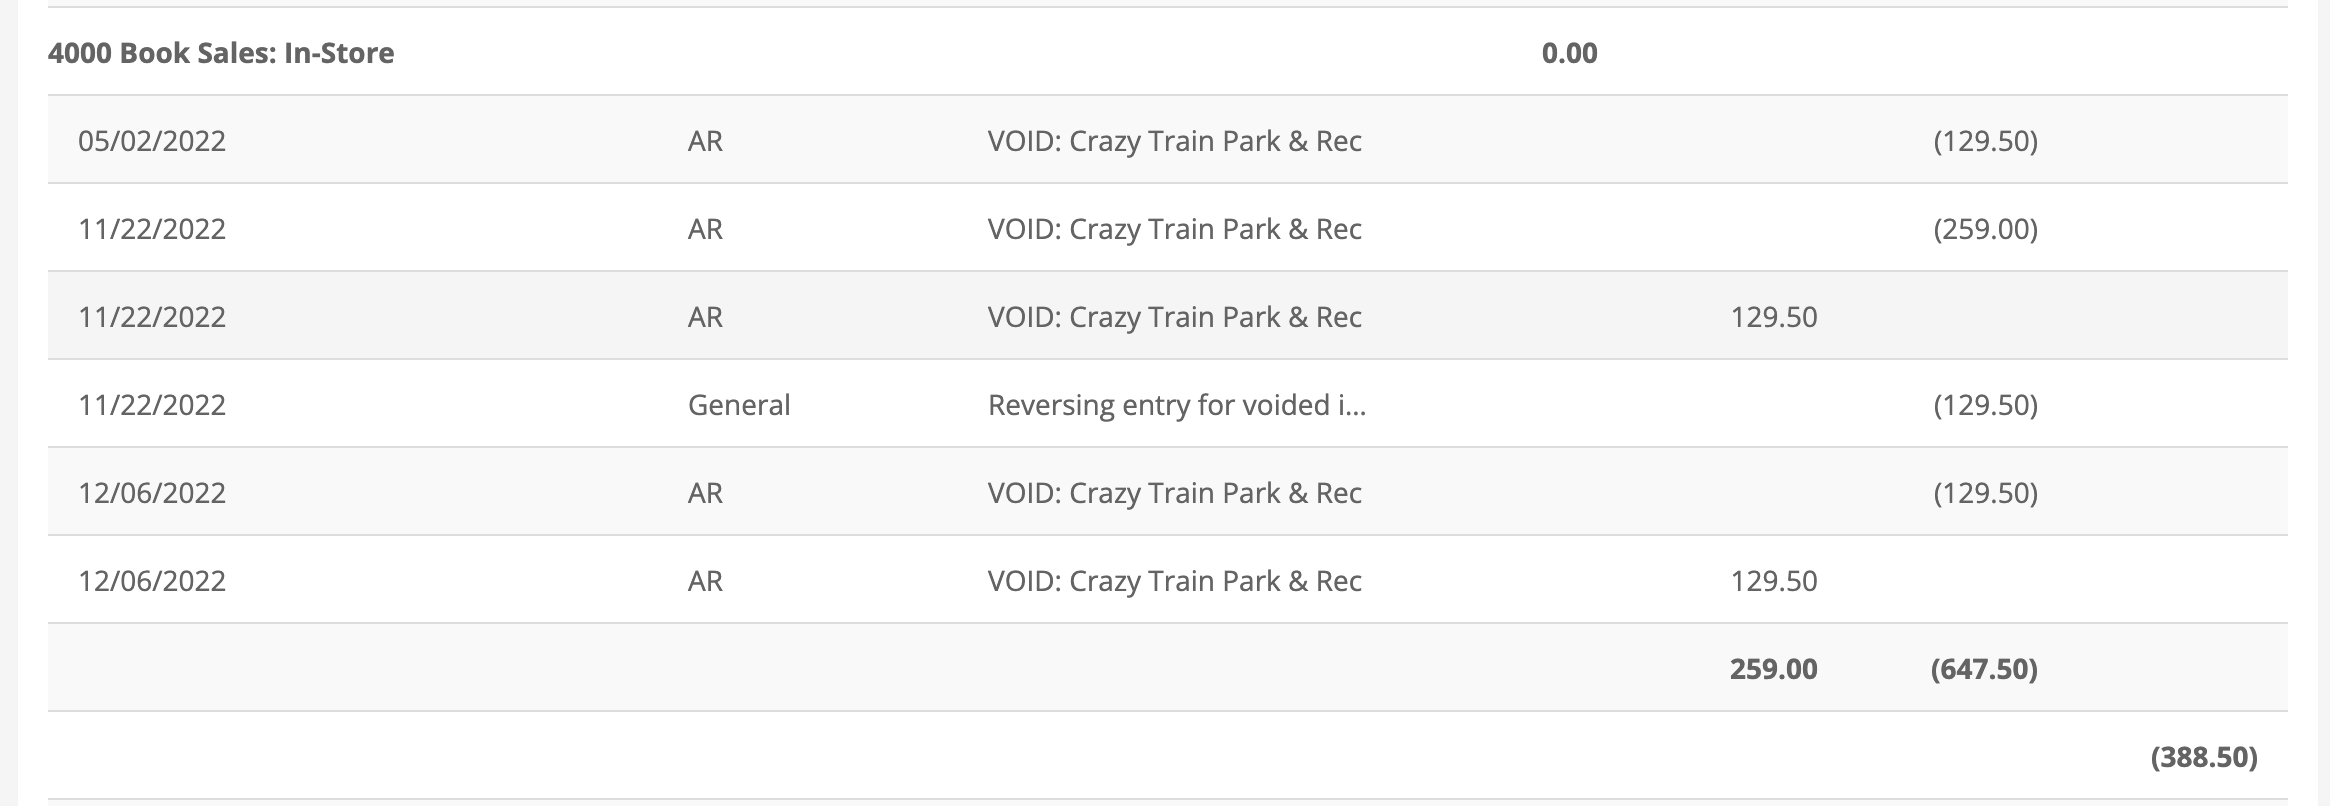
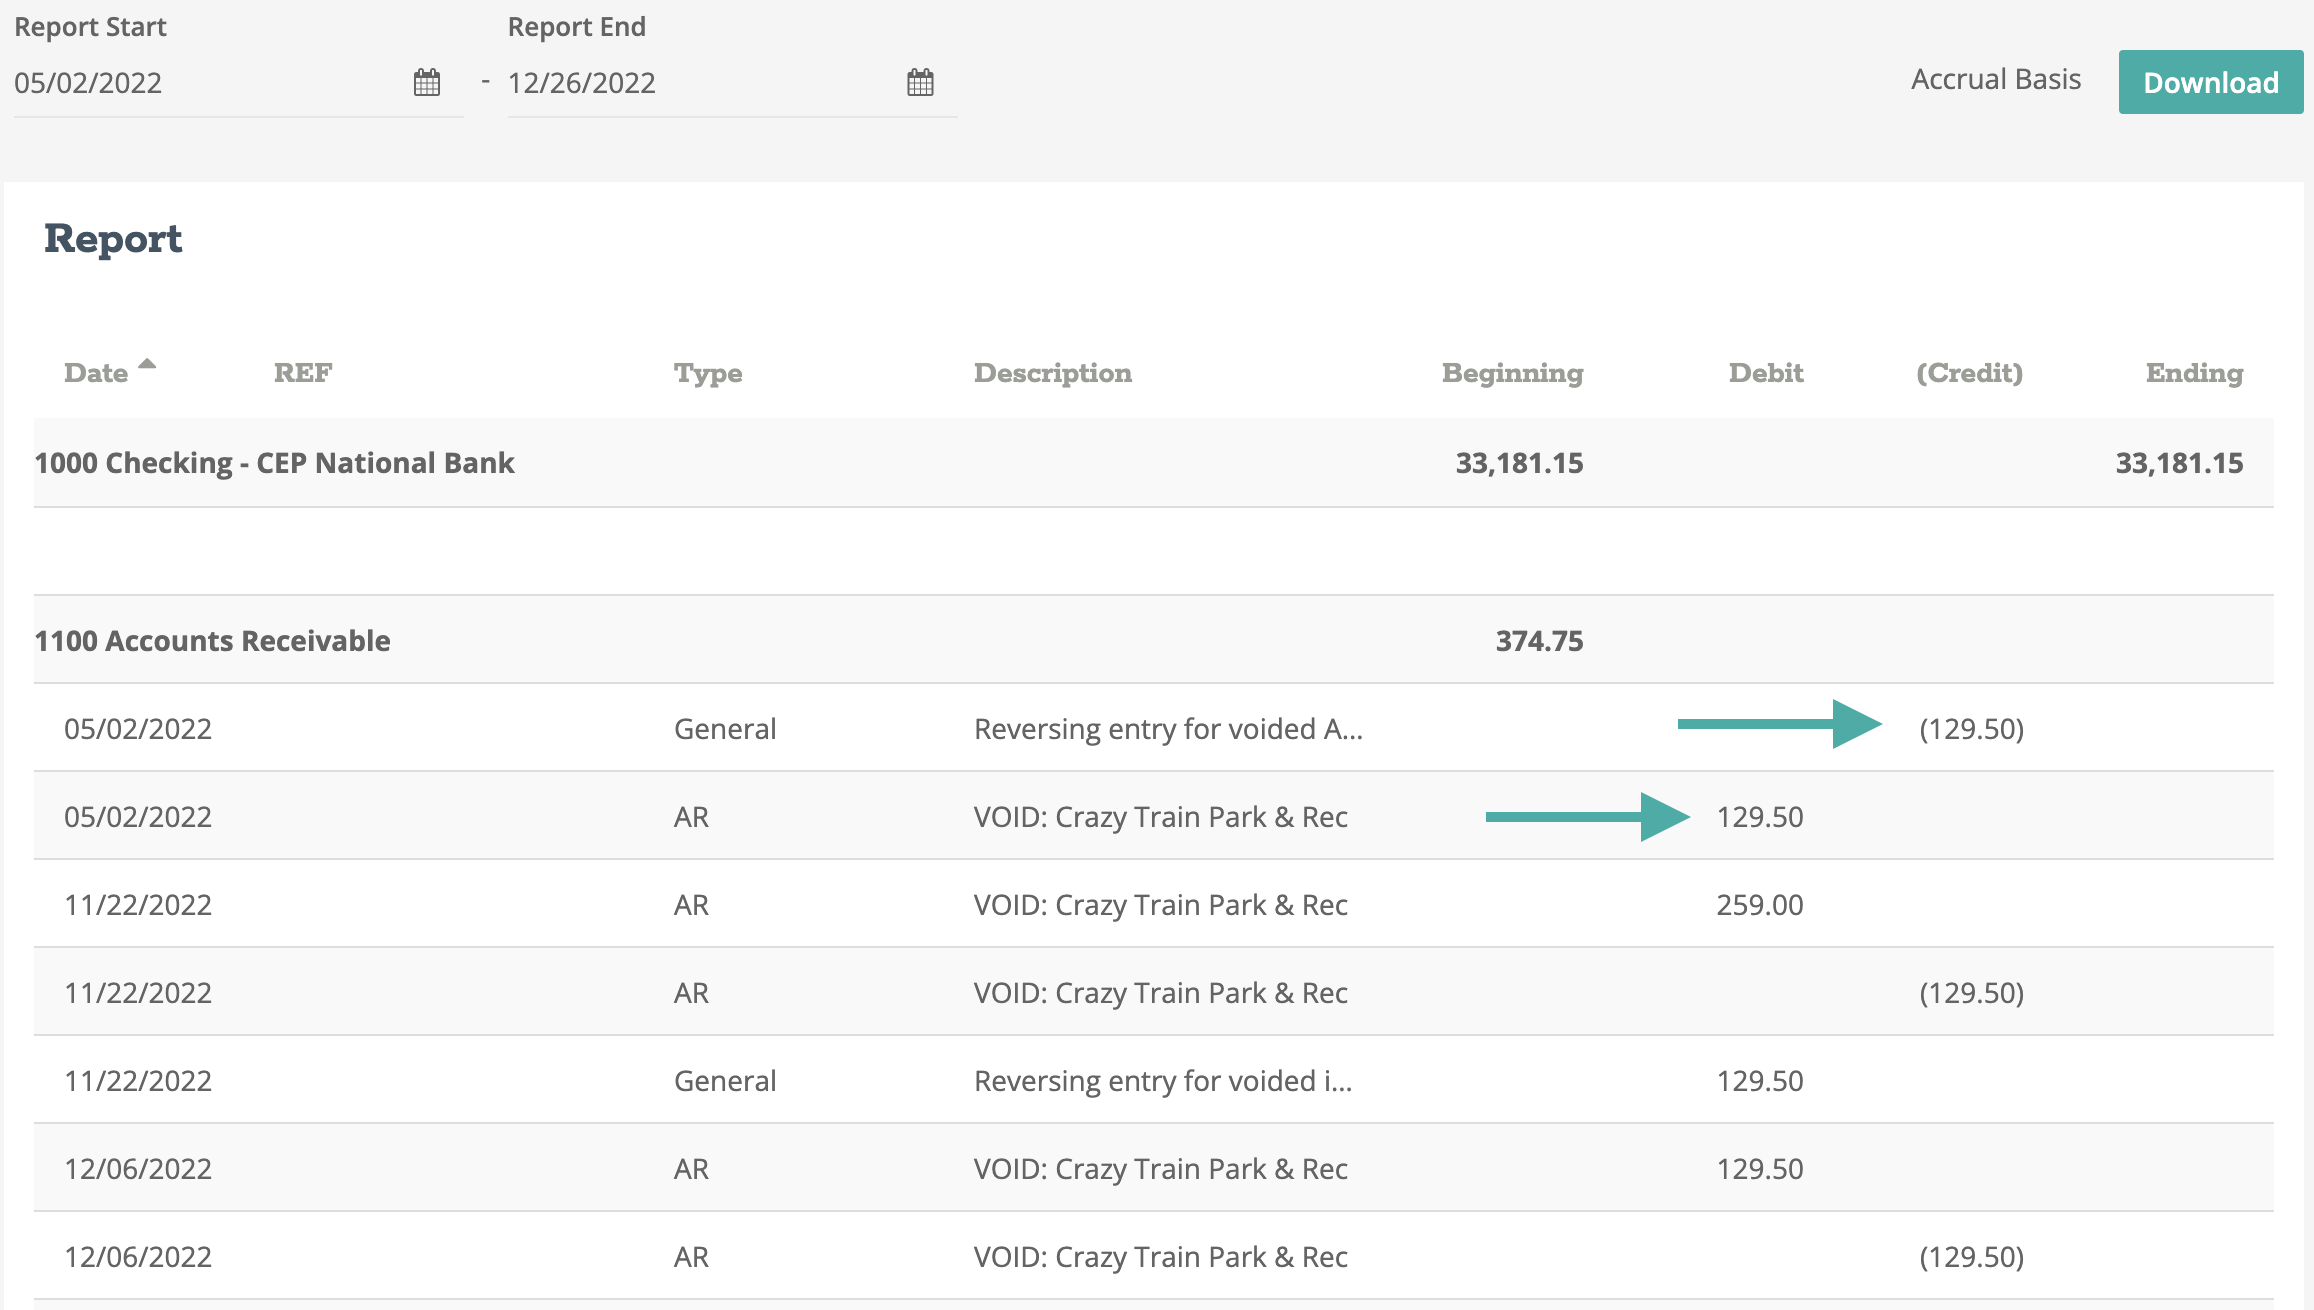
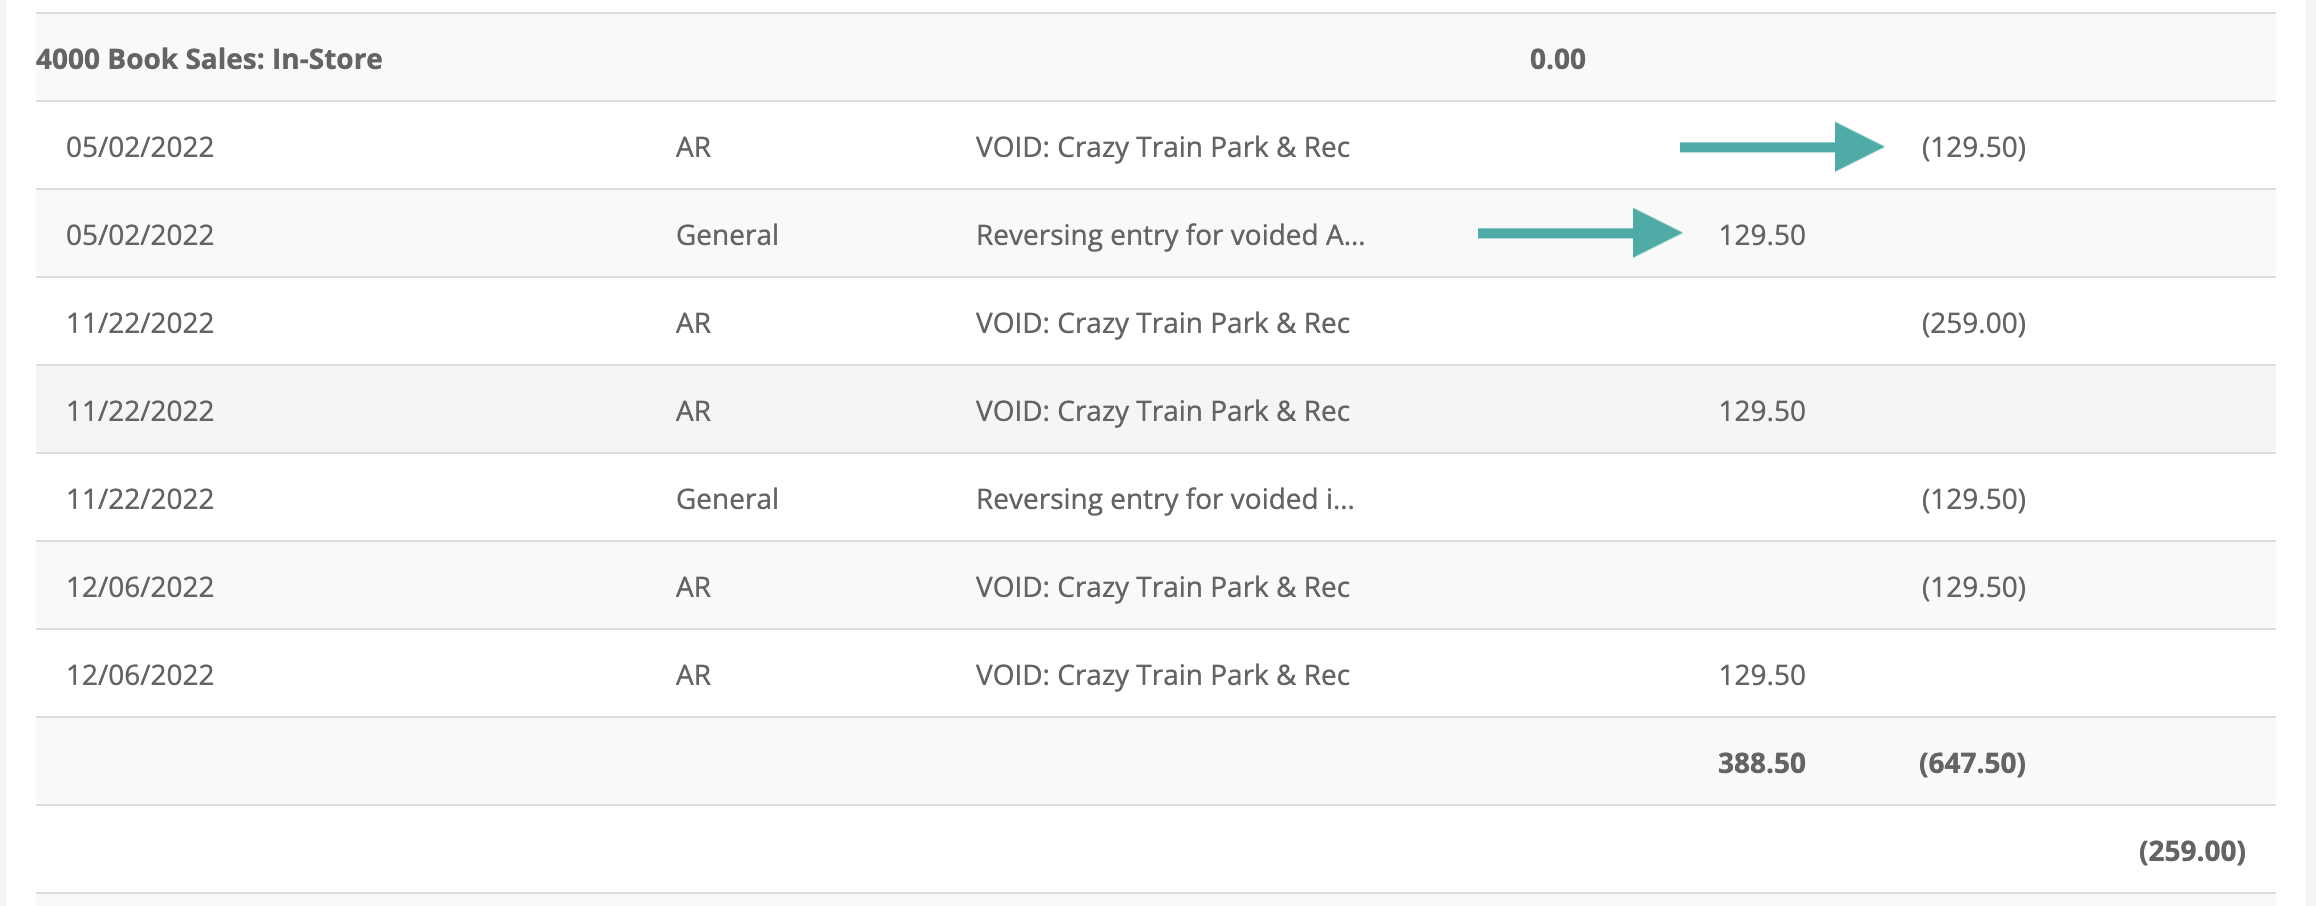
- Step 3 - Locate the Accounts Receivable account, Sales Tax Payable account, and the Sales account(s) in which the invoice(s) were posted too. These transactions will have the word VOID next to them. Locate the amounts for each account and note the debit or credit values. See example below.
| 05/02/2022 | |
| Debit | Credit |
| Account 1100 - $129.50 | Account 4000 - $129.50 |
Note: Depending on the sales items that were included on the invoice, there could be multiple Sales accounts tied to the invoice. If there is more than one, be sure to note the account numbers and the transaction amount.
- Step 4 - Navigate to Journal Entries, and we will now create our reversing entry.
- Step 5 - Click in the Create New Journal Entry window and set the date to the original invoice date and set the description to "Reversing entry for voided AR transaction".

- Step 6 - Add the Accounts Receivable to the journal entry details and reverse (credit) the noted amount.
- Step 7 - Add your sales tax payable and/or sales account(s) to the journal entry details and reverse (debit) your noted amount(s).
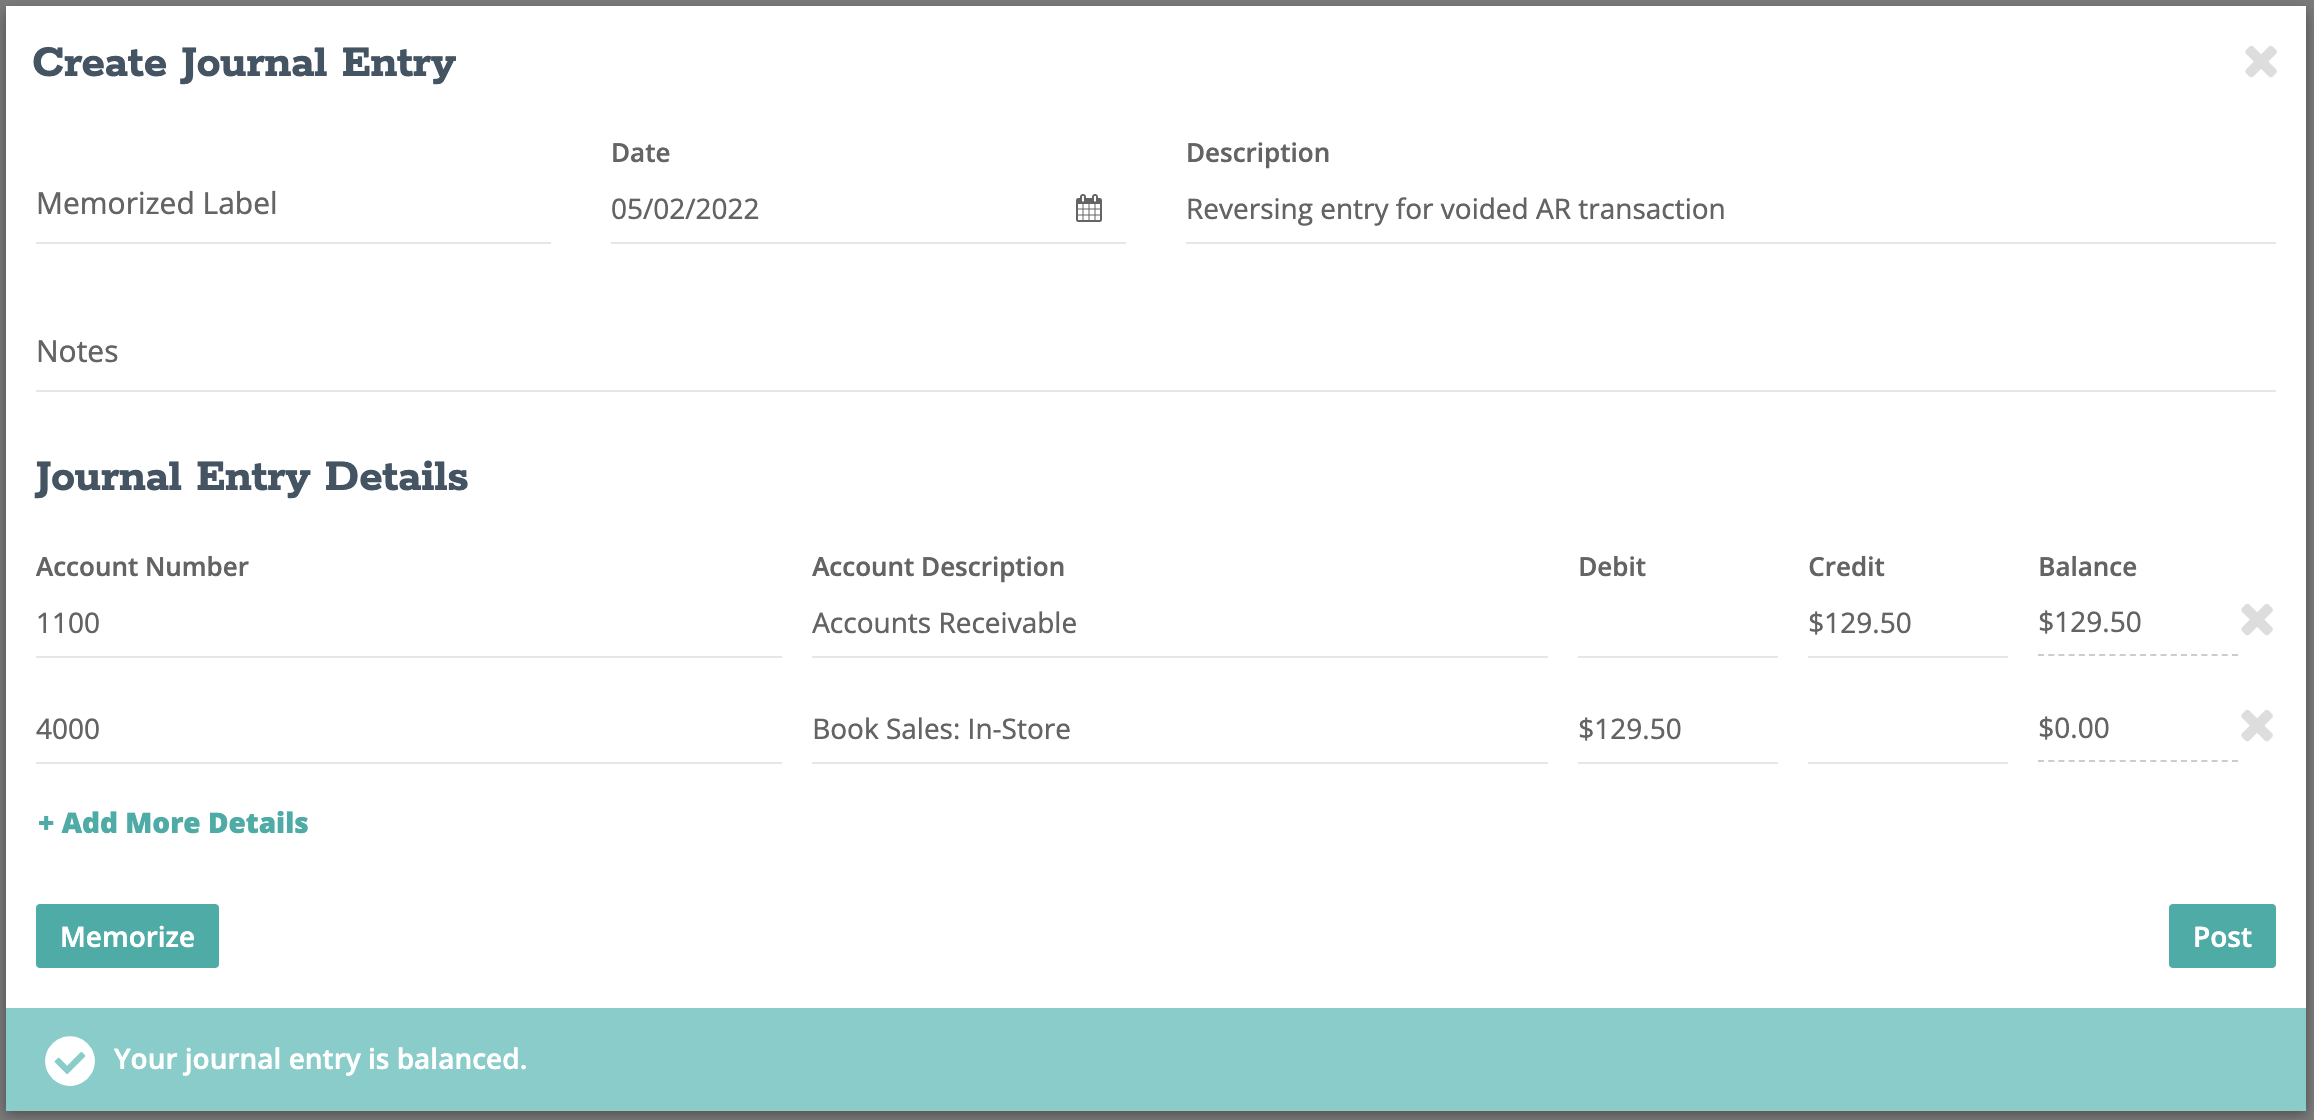
- Step 8 - When your journal entry is balanced, click "Post".
- Step 9 - Navigate to Reports > Accountant > General Ledger. Adjust your Report Start date and Report End date to the same dates as set back in step 2. Locate the voided transaction(s) on the Accounts Receivable account, Sales Tax Payable account, and the Sales account(s). Locate the amounts for each account and note the debit and credit values and how they zero each other out or reverse the original void.
- Step 10 - Repeat this process for all additional voids that have occurred either before or during the simulation time period.
Note: This process might be required for the automatic reversing entry on the date the void occurred. If the date the void occurred falls within the simulation reporting period, repeat this process for the second entry.
After all reversing journal entries have been posted, return to your General Ledger report and review your Accounts Receivable, Sales Tax Payable, and Sales Account(s). You should notice that your adjusting journal entries have balanced out those accounts by creating the reversing entries on the correct dates.
Note: To save time on data entry, you can group all reversing entries into one journal entry for each month and post on the last day of the month.
If you have made a mistake at any point posting your journal entries, learn how to edit or delete a journal entry.